
Set-up notes:
The shock requires approximately 85% of rider weight in lbs = psi in the air spring. Example: 200lb rider would start with 170psi. (85% is your starting point, personal preference might lead you to use 5%-10% firmer/softer to taste.)
The dimple between the +ve and -ve air spring chambers is around the sag point. Because there's more air than in most shocks it takes a little longer to equalize. I find it better to slowly jiggle around the sag point, listening for the hiss of equalization, than to just bounce up and down, particularly if you make a big pressure change.
When inflating the shock from 0psi you’ll almost certainly need to equalize the +ve and -ve pressure at 50% and 75% of your target pressure. The air chamber is HUGE, so inflating from 0psi takes a long time, using a floor pump can save time and effort.
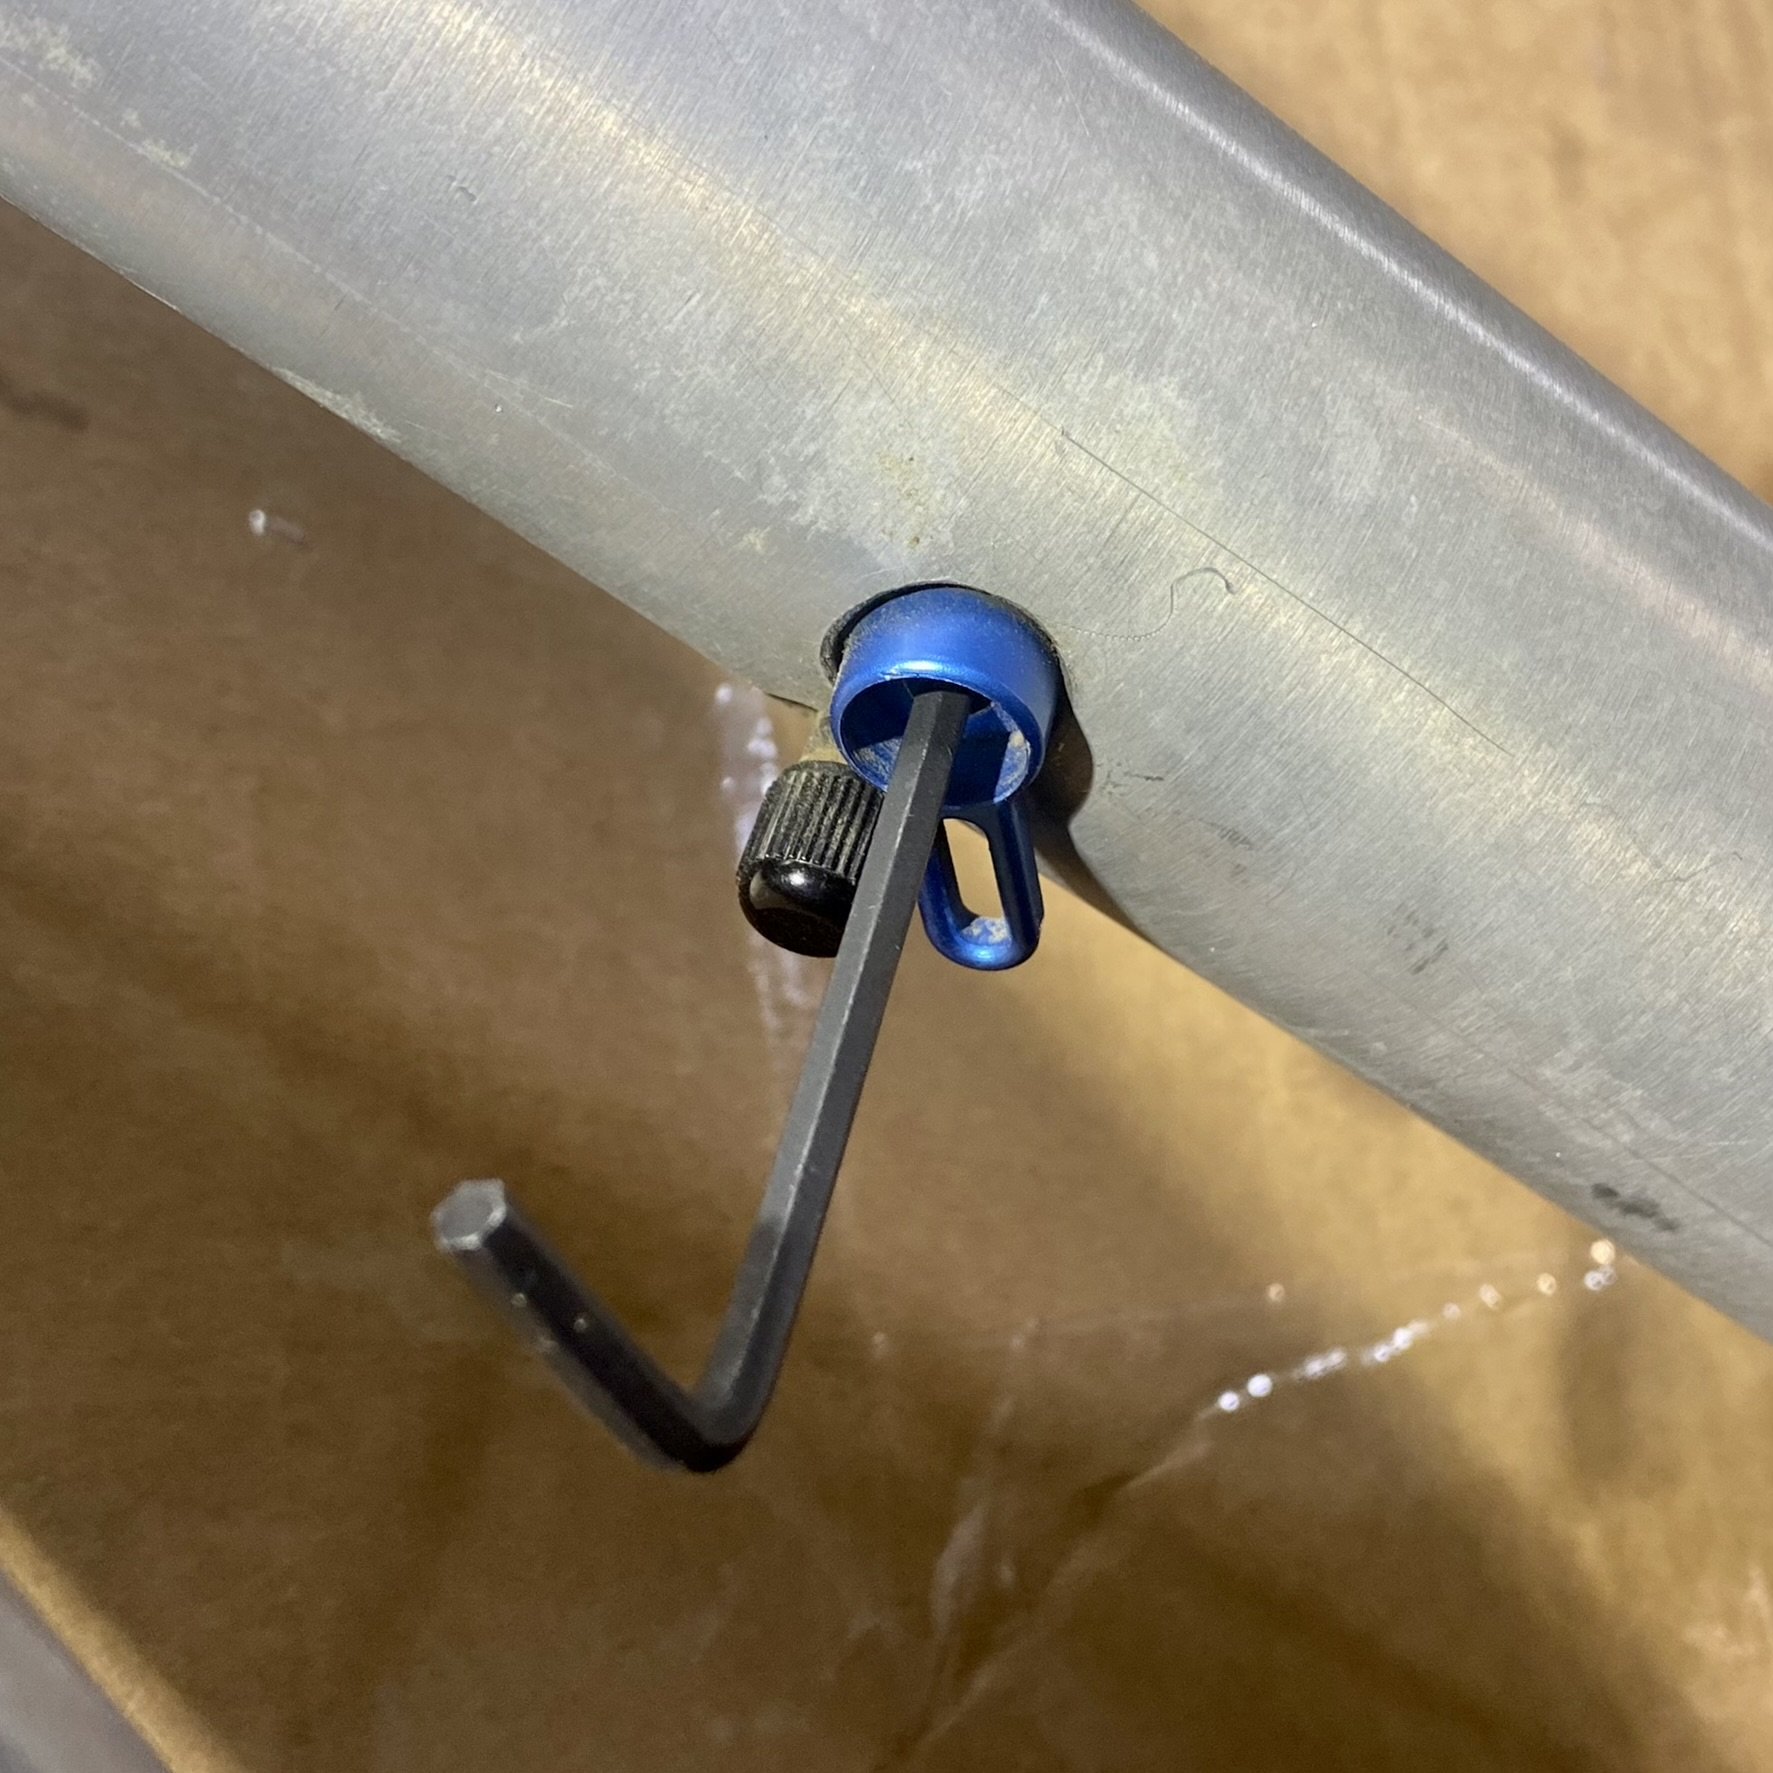
Rebound damping is adjusted with a 3mm allen key, the adjuster is red but it’s hidden from view inside of the blue lever. Over the years I've come across some people who wind all of the adjusters closed for climbs and open everything up for descents, my hope is that requiring a tool will prevent people from doing this.
The rebound adjuster has soft stops at either end of the adjustment range. Forcing the adjuster past the stops won't give more adjustment - but you might break something.
The rebound damping has about 2 turns of adjustment range (clockwise=slower). Rebound damping should correspond to the spring force, so lighter riders (using about 140psi in the air spring) will need to be toward the faster end of the range; the middle of the range is good for riders using around 200psi; and heavier riders will use the slower part of the adjusterment range.
The blue lever is for Low Speed Compression (LSC), it's open/soft when the lever is next to the air valve and firm when moved away. It has 5 positions and swings 90 degrees. It's quite a subtle adjustment, moreso than on some other bikes because the bike pedals very well even when it's fully open it doesn’t need a firm lockout/pedal function.

There are many tools which can help you route internal cables. I’ve enjoyed using the Sram Reverb Barb Connector, with a length of brake hose. It’s particularly helpful when routing the rear brake hose through the round hole on the top of the chainstay, install the rubber grommet first.
Suspension tuning hints:
Any time anyone asks me for help tuning their suspension. My advice is to watch the 10 minute suspension setup video below (left).
The advanced setup video is also excellent, though it goes in to more detail than most people bother with.
Bottom Bracket notes:
The 30mm spindle is compatible with the following cranks: Race Face Cinch Next SL/Next R/Turbine/Era, FSA 30mm, Cannondale, Ignite, 5Dev, Garbaruk. There may be more, please ask if you have another crank in mind.
The 30mm spindle is NOT compatible with 30mm cranks from Hope, Cane Creek, E13, White Industries, because they use proprietary spline shapes.
The 24mm spindle spacer allows use of cranks having 24mm spindles, such as Shimano, FSA 24, Sram GXP.
The Datum is NOT YET compatible with 28.99mm DUB system cranks from Sram because the cannot be removed from their spindle.
Please reach out if you’re interested in using a spindle not mentioned above.
Service documentation:
Service documentation is forthcoming, if you need service assistance with your Digit Bike or Integer strut, please contact us directly.
Datum Bikes and the Integer strut were designed for long service life and ease of service.

The Integer Strut and all the tools needed for a complete service